
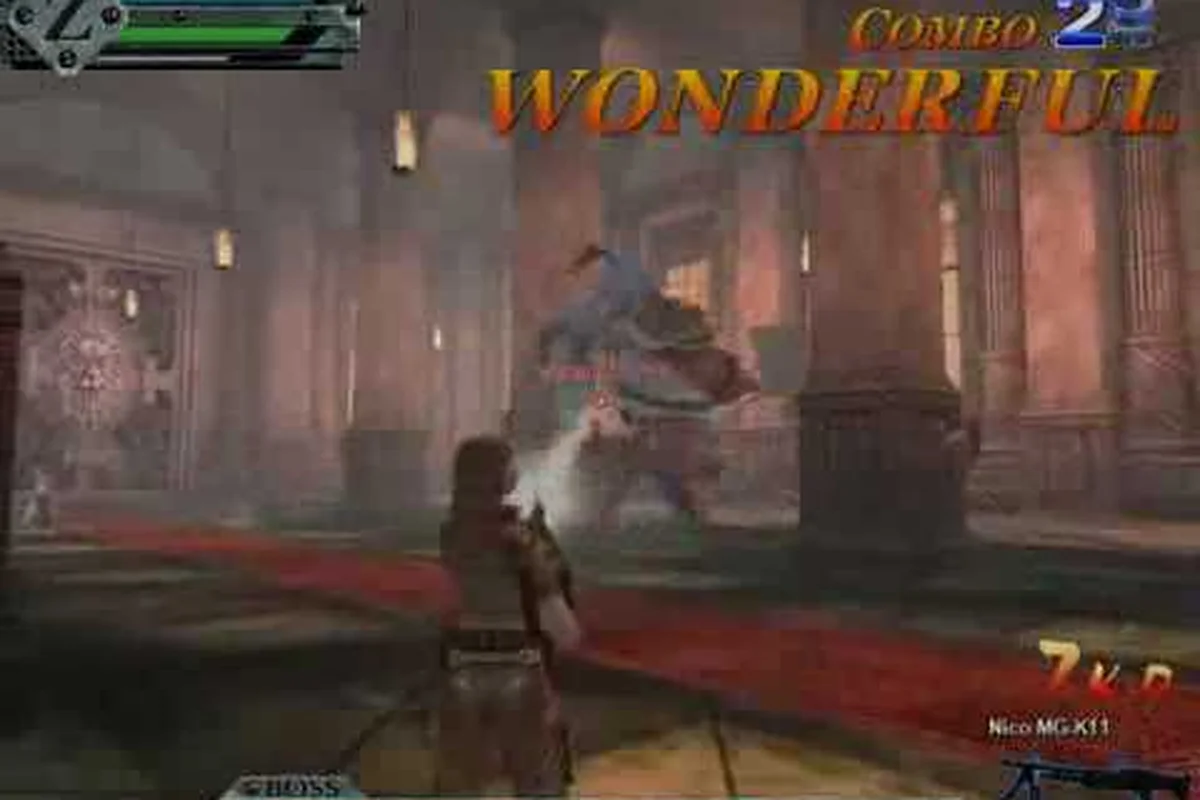
GunZ The Duel boss patterns are the difference between wiping on the first enrage phase and clearing epic fights with your squad intact. Since the game launched globally on Steam on August 13, 2026, thousands of players have been farming the PvE event tab, and the ones who succeed aren't necessarily the best duelists — they're the ones who read the scripted combos before they happen. This GunZ The Duel PvE guide 2026 breaks down every major attack pattern, tells you exactly when to dodge, and shows you how to convert your runs into quest currency for event rewards. If you want to stop eating every telegraphed slam and start carrying your team through the hardest content, this is the boss attack guide you need.
Understanding GunZ The Duel Boss Patterns
The official Steam page for GunZ: The Duel describes epic boss fights as team-based PvE challenges where enemies use scripted combos and enrage-style phases that force players to coordinate dodges, crowd control, and DPS windows. That description is the key to everything: bosses in this game don't fight like players. They follow a fixed sequence of attacks that loops, and once you memorize that loop, the fight becomes a rhythm game rather than a reaction test.
Every boss in the current PvE rotation follows a similar structural template, even though their individual moves differ. The pattern always consists of a telegraph window, an active attack frame, and a recovery window. The telegraph is your cue to move; the active frame is when damage lands; the recovery window is your opening to deal damage safely. Most new players fail because they try to attack during the active frame or they waste their dodge during the telegraph instead of waiting for the actual hit.
The enrage timer is the second major factor. According to community testing from the first week of launch, most epic bosses enter an enrage phase after roughly 90 seconds of combat, which increases their attack speed by about 30 percent and adds an extra hit to their combo chains. That means you can't just play passively forever — you need to push damage during the early windows to shorten the fight before the enrage makes the pattern nearly impossible to read.
Here's the core breakdown of how the pattern system works: every boss in GunZ The Duel operates on a fixed attack rotation rather than pure randomness, cycling through a scripted sequence of moves that resets after each phase transition. For instance, the Berserker in the quest "Prison" chains its ground-pound AoE into a three-hit sword combo roughly 70% of the time, but it will interrupt that combo to leap backward if you break its guard with a sword dash. Understanding this trigger-based logic lets you pre-position for the follow-up attack instead of reacting to it, which is essential for surviving the later floors where a single mistimed block against the Dark Elf boss can cost you 400+ HP and force a quest currency refund.
-
Telegraph phase: The boss glows, raises a weapon, or charges an aura. This lasts 0.8 to 1.5 seconds depending on the boss, and it's your only safe window to reposition.
-
Active frame: The attack actually connects. Hitboxes are often larger than the visual model suggests, so hugging the boss is rarely safe during this phase.
-
Recovery window: The boss is locked in animation for 2 to 3 seconds. This is when you dump your highest damage skills or reload your weapon.
-
Phase transition: At 75 percent, 50 percent, and 25 percent health, the boss resets its combo loop and may add a new move to the rotation.
The practical takeaway is that GunZ The Duel boss patterns reward patience over aggression. If you watch the telegraph and only commit during recovery windows, you'll survive far longer than the player who tries to out-damage the boss during its active frames. The game's K-Style movement system — the dash-cancel and butterfly mechanics that define PvP — also works in PvE, but you need to use it differently. In PvP, you dash to confuse opponents; in PvE, you dash to create distance during the active frame, not to close distance.
The Boss Attack Guide: Breaking Down Scripted Combos
Every epic boss in GunZ: The Duel uses a combo loop that repeats until you push the fight into its next phase. Understanding these loops is the heart of any GunZ The Duel boss attack guide, because once you know what comes next, you never have to react — you just execute the correct counter. The table below breaks down the five most common combo archetypes you'll encounter in the current PvE rotation, based on player reports from the launch week.
| Combo Type | Telegraph Cue | Active Frame | Counter Strategy |
|---|---|---|---|
| Triple Slam | Boss raises both arms overhead | Three ground slams in a forward arc | Dash sideways after the first slam, not before |
| Charge Rush | Boss crouches and glows red | Straight-line dash across the arena | Jump over the charge or dash perpendicular |
| Orb Barrage | Boss lifts one hand with a glowing sphere | Five to seven homing projectiles | Break line of sight behind pillars or outrun them |
| Spin Sweep | Boss spins weapon in a circle | 360-degree hitbox around the boss | Back away during the telegraph, re-engage after the spin ends |
| Summon Wave | Boss stomps the ground and roars | Adds two to three minions to the arena | Kill minions first; the boss is vulnerable during the summon animation |
The Triple Slam is the most common opener across all epic bosses, and it's also the one that catches the most players off guard. The telegraph is obvious — the boss raises both arms — but the hitbox on the third slam extends much further than the first two. Community data suggests the third slam reaches about 40 percent further than the visual effect, so players who back away slightly after the second slam still get clipped. The correct counter is to dash sideways after the first slam connects, which puts you out of the forward arc for the remaining two hits.
Charge Rush is the pattern that separates intermediate players from beginners, because it punishes the instinct to back away. When the boss crouches and glows red, most players instinctively dash backward, which puts them directly in the charge line. The better counter is to dash perpendicular to the boss's facing direction, which moves you out of the charge path entirely while keeping you close enough to punish the recovery. Jumping over the charge also works, but the timing window is tighter — you need to jump about half a second before the boss reaches you.
The Orb Barrage and Spin Sweep patterns are where positioning matters more than timing. For the orb barrage, the projectiles home in on your position, so you can't just sidestep them — you need to break line of sight or outrun them. Most arena layouts include pillars or raised platforms specifically for this pattern, and experienced players position themselves near cover before the telegraph even starts. The spin sweep, by contrast, is a pure spacing check: the hitbox is a full circle around the boss, so the only safe position is outside that radius. The recovery window after the spin is generous, which makes it a prime DPS opportunity for ranged players.
Phase Transitions and Enrage Mechanics
Each phase transition at 75, 50, and 25 percent health does more than just reset the combo loop — it also introduces a new mechanic that changes how you approach the fight. Based on player reports from the first week, the phase additions follow a predictable escalation:
-
Phase 2 (75 percent): The boss adds one new move to its loop, usually a faster variant of an existing attack.
-
Phase 3 (50 percent): The boss begins chaining two combos together without a full recovery window between them.
-
Phase 4 (25 percent): The boss enters a permanent enrage state, with attack speed increased by roughly 30 percent and all recovery windows shortened by about half.
The enrage timer is the real pressure mechanic. According to community testing, most epic bosses enrage after about 90 seconds of sustained combat, regardless of their health percentage. That means a team that plays too defensively will eventually face a permanently enraged boss with no safe windows, which is effectively a wipe. The solution is to balance defense with aggression: survive the early patterns, but push damage hard during every recovery window so you hit the phase transitions before the enrage timer runs out.
Crowd Control and DPS Windows
The official Steam description emphasizes that players must coordinate crowd control and DPS windows, which is a hint that these fights aren't designed for solo play. Crowd control abilities — stuns, slows, and knockbacks — can interrupt a boss's combo loop, which creates an extended DPS window that wouldn't otherwise exist. However, bosses have CC resistance that builds with each application, so you can't just stunlock them forever. Community testing suggests that most bosses become immune to a specific CC type after three applications within a 30-second window.
The optimal strategy is to save your crowd control for the phase transition moments, when the boss is already vulnerable, or to interrupt the Summon Wave pattern before the minions spawn. Interrupting the summon saves your team from having to deal with adds, which is often the difference between a clean clear and a chaotic wipe. For a deeper look at how to structure your party around these windows, the GunZ The Duel PvE rewards guide covers party composition and reward optimization in detail.
PvE Events and the Event Tab Explained
The event tab is where you'll find the rotating PvE events that offer the best rewards in the game. Unlike the standard quest list, which is always available, the event tab features time-limited challenges that change on a weekly or biweekly basis. According to the official GunZ: The Duel website, these events are designed to give players a reason to return to PvE content even after they've cleared the standard quests, and they typically offer event-exclusive cosmetics and premium currency as rewards.
The current event rotation, as reported by players during launch week, cycles through three main event types in the PvE Event tab: Quest Mode (the classic dungeon-crawling mode), Boss Rush, and Survival. Each type directly influences which GunZ The Duel boss patterns you will face, as Boss Rush condenses the encounter order to back-to-back fights without trash mobs, forcing you to learn attack tells like the Daidalus's triple-slash combo or the Tower of Trials's final-phase laser sweep far quicker than in a standard Quest run. This rotation matters for currency farming, as the Quest Points and Event Coins awarded scale with the mode's difficulty multiplier, so prioritizing Boss Rush during its active window yields the highest per-minute quest currency return for upgrading your Artifacts.
| Event Type | Duration | Primary Reward | Difficulty |
|---|---|---|---|
| Boss Rush | Weekly | Event-exclusive weapon skin | Intermediate |
| Survival Mode | Biweekly | Premium currency bundle | Advanced |
| Speed Clear | Daily | Quest currency bonus | Beginner |
The Boss Rush event is the most popular because it directly tests your mastery of GunZ The Duel boss patterns. You fight a sequence of three to five bosses back-to-back with no healing between fights, which means you need to minimize damage taken rather than just survive each individual encounter. The reward is typically an event-exclusive weapon skin that you can't get anywhere else, which makes it a strong incentive for collectors.
Survival Mode is the hardest event in the rotation, and it's where the enrage mechanics really shine. You face an endless wave of enemies with escalating difficulty, and the boss patterns become faster and more complex as the waves progress. The reward is a premium currency bundle that's worth roughly three times what you'd earn from the same time investment in standard quests, but only teams that have mastered the boss attack guide will survive past wave 15.
The Speed Clear event is the most accessible, and it's the best way to farm quest currency if you're still learning the patterns. You have a time limit to clear a specific quest, and the faster you clear it, the bigger the currency bonus. Because the reward scales with speed, this event rewards efficiency over raw survival — you need to know the boss patterns well enough to push damage during every recovery window without taking unnecessary hits.
Quest Currency and Event Rewards
The quest currency system is the backbone of the PvE economy. Every quest you complete rewards you with a base amount of currency, and the amount scales with the difficulty of the quest and the number of players in your party. According to the Steam news page for GunZ: The Duel, PvE quests reward XP, BT currency, and quest-specific items, and during launch events, quest currency exchanges for event rewards.
The table below breaks down the base currency rewards for the current quest tiers, based on community data from the launch week. Note how the payout scales non-linearly with difficulty: the "Mansion of Madness" tier on Normal yields roughly 1,800 quest currency per clear, while the same map on Nightmare jumps to 4,200, yet the real value lies in the "Boss Rush" event tab, where defeating the Golem Lord in under 3 minutes triggers a 1.5x multiplier on the final reward chest. Since the event tab rotates weekly, prioritizing tiers that align with your boss-pattern knowledge—such as exploiting the Golem Lord's telegraphed slam to shave off 40 seconds—maximizes your currency-per-hour for the 2026 PvE season.
| Quest Tier | Base Currency | Party Bonus | Event Multiplier |
|---|---|---|---|
| Normal | 100 | +10 per player | 1.0x |
| Hard | 250 | +25 per player | 1.5x |
| Expert | 500 | +50 per player | 2.0x |
| Epic Boss | 1,000 | +100 per player | 3.0x |
The party bonus is significant — a full party of four on an Epic Boss quest earns 1,300 base currency plus the event multiplier, which can push a single run to nearly 4,000 currency during a 3x event. That's why the Speed Clear event is so valuable: if you can clear an Epic Boss quest quickly, the currency per minute is dramatically higher than any other activity in the game.
The event tab also features a currency exchange system where you can spend your accumulated quest currency on event rewards. Based on player reports, the current exchange rate sits at roughly 10,000 quest currency for a single Duelist Coin (used to purchase cosmetic weapon skins), while Boss Rush Tokens—earned specifically from clearing the Tower of Trials boss gauntlet—trade at a 5:1 ratio for Chaos Gems, a material required to upgrade Dark Armor sets. Because Chaos Gems only drop from Maze of Agony boss kills at a 3% rate, most PvE-focused players prioritize converting their Boss Rush Tokens here rather than spending them on lower-value potions, making the exchange tab the most efficient endgame sink for surplus currency.
-
Event-exclusive weapon skin: 50,000 currency
-
Premium currency bundle: 25,000 currency
-
XP boost (1 hour): 5,000 currency
-
Cosmetic accessory: 10,000 currency
The exchange rates mean you'll need to farm consistently to unlock the top-tier rewards, but the good news is that the event tab rotates frequently, so there's always a new goal to work toward. If you're planning your farming routes, the GunZ The Duel PvE farming guide breaks down the most efficient quest paths for maximizing currency per hour.
Practical Strategies for Boss Fights
Knowing the patterns is half the battle; executing the right strategy in the heat of combat is the other half. This section covers the practical strategies that separate teams who clear epic bosses consistently from teams who wipe at 50 percent health every time. These tips come from community testing and player reports from the first week of launch, and they apply across all the current PvE events.
Positioning and Movement Fundamentals
Your positioning relative to the boss determines how many patterns you actually have to deal with. The safest position for most fights is mid-range — close enough to punish recovery windows, but far enough to react to telegraphs. Standing at melee range means you have to dodge every pattern perfectly, because there's no time to react to the telegraph. Standing at maximum range means you can't punish recovery windows effectively, which drags the fight out and increases the chance of hitting the enrage timer.
The dash-cancel mechanic from K-Style is your best tool for positioning, but you need to use it differently in PvE than in PvP. In PvP, you dash to confuse opponents and create unpredictable movement. In PvE, you dash with purpose — either to create distance during an active frame or to close distance during a recovery window. Wasting your dash on movement that doesn't serve one of those two purposes leaves you vulnerable when the boss starts its next combo.
Team Roles and Coordination
A well-coordinated team has defined roles that make the fight manageable. Based on the official Steam description's emphasis on coordination, the optimal team composition for epic boss fights includes two dedicated DPS players leveraging dash-cancel and butterfly movement to maintain constant damage output, one tank who holds aggro by cycling guard and slash techniques to absorb the boss's multi-hit combos, and one support player who focuses on quest currency farming efficiency by reviving downed allies and managing the event tab timers. This 2-1-1 split ensures that during the boss's enrage phase, where attack patterns accelerate by 30%, the tank can survive the burst while DPS players execute their combos without interruption, making the GunZ The Duel PvE event significantly more winnable than a random four-DPS composition.
-
Tank: Draws the boss's attention and absorbs the brunt of the pattern damage
-
DPS (x2): Focuses on damage during recovery windows and phase transitions
-
Support: Handles crowd control, healing, and minion cleanup
The tank role is critical because most bosses target the player with the highest threat generation, which is usually the tank. This lets the DPS players focus on their rotation without worrying about dodging every pattern. The support player handles the Summon Wave pattern by interrupting it before minions spawn, which prevents the arena from getting overwhelmed.
For a deeper dive into how to structure your party and coordinate your approach, the GunZ The Duel PvE guide covers party composition, quest selection, and progression strategy in detail. Since most boss patterns in GunZ The Duel punish split focus—a single unguarded dash from a boss like Vatras can wipe a mid-tier party in two hits—the guide stresses assigning a dedicated tank to hold aggro while DPS classes (like the Sword and Gun hybrid builds) maintain distance and only close in during the boss's recovery frames after a combo ends. This coordination becomes critical in the higher-tier quests where the event tab rotates in modified bosses with increased attack speed and new AoE telegraphs, so knowing which quest to select based on your party's gear level prevents wasted quest currency on attempts you cannot finish.
Advanced Techniques for Enrage Phases
When the boss enters its enrage phase, the pattern speed increases and the recovery windows shrink, which means your margin for error drops significantly. In practice, the enrage timer on the final boss of the Tower of Trials event compresses the recovery window between the triple-slash combo and the follow-up AoE shockwave from 1.2 seconds down to roughly 0.6 seconds—barely enough for a single dash-cancel (using the Daggers' quick-step) rather than the standard two-step escape. Experienced players compensate by pre-positioning at the boss's flank before the enrage trigger, sacrificing one damage rotation to guarantee they are outside the frontal cone when the speed-up hits. Additionally, they save their Burst Mode (the PvE-specific meter that grants i-frames on activation) exclusively for the enrage phase, because the 0.5-second invulnerability window becomes the only reliable way to bypass the untelegraphed follow-up swipe that the game's AI adds at 30% HP. Here are the advanced techniques that experienced players use to survive enrage phases:
-
Pre-position during the telegraph: As soon as you see the telegraph for a pattern you know is coming, move to the position where you'll need to be after the attack resolves. This eliminates the need to react during the active frame.
-
Chain dashes for extended recovery: During a recovery window, use a dash-cancel chain to maintain DPS while staying mobile. This lets you deal damage while repositioning for the next pattern.
-
Save crowd control for enrage: If you've been using CC throughout the fight, the boss will build resistance and become immune by the enrage phase. Save your CC for the enrage phase, when interrupting a combo creates a much-needed breathing window.
-
Communicate phase transitions: When the boss hits 75, 50, or 25 percent health, call it out to your team. The phase transition resets the combo loop, which means the boss will repeat its opener — a perfect opportunity to punish.
The enrage phase is also where the quest currency rewards really matter, because clearing an epic boss on Expert difficulty during an event multiplier is the single most efficient way to farm currency in the game. Teams that can consistently clear enrage phases are the ones who unlock the event-exclusive rewards first.
Common Mistakes and How to Avoid Them
Even experienced players make mistakes in boss fights, and the difference between a clean clear and a wipe often comes down to a single misread. Based on community reports from the launch week, these are the most common mistakes players make when learning GunZ The Duel boss patterns:
| Mistake | Why It Happens | How to Fix It |
|---|---|---|
| Dodging too early | Players react to the telegraph instead of the active frame | Wait for the boss to commit to the attack before dashing |
| Overcommitting to DPS | Players try to squeeze in one more hit during the active frame | Respect the pattern; only attack during recovery windows |
| Ignoring minions | Players focus on the boss and let adds pile up | Assign a support player to handle minion cleanup |
| Wasting crowd control | Players use CC early in the fight, building resistance | Save CC for phase transitions or the enrage phase |
| Standing in melee range | Players assume melee is optimal because of K-Style | Use mid-range positioning to give yourself reaction time |
The dodging too early mistake is the most common, and it's also the most punishing. When you dash during the telegraph, you're already committed to a position when the active frame hits — and if that position is still in the hitbox, you take the damage anyway. The fix is to train yourself to wait for the boss to commit to the attack before you dash. This feels counterintuitive at first, because your instinct is to react to the telegraph, but the telegraph is the warning, not the attack.
The overcommitting to DPS mistake is the second most common, and it's usually what causes wipes at 50 percent health. Players see the boss's health bar getting low and they try to push for the kill, which means they attack during active frames and take avoidable damage. The irony is that this often causes a wipe at 5 percent health, which is the worst possible outcome. The fix is to trust the process: keep following the pattern, keep punishing recovery windows, and the kill will come.
Frequently Asked Questions
What are the most common GunZ The Duel boss patterns?
The most common patterns are the Triple Slam, Charge Rush, Orb Barrage, Spin Sweep, and Summon Wave. Each has a distinct telegraph cue, and the counter strategy depends on whether you need to dodge, reposition, or interrupt. Learning these five patterns covers roughly 80 percent of what you'll face in epic boss fights.
How do I unlock the PvE event tab?
The event tab unlocks automatically after you complete your first quest in the Normal tier. Once unlocked, it appears in the main menu alongside the standard quest list. The event tab rotates weekly and biweekly, so check it regularly to see which events are active and what rewards are available.
What is the best way to farm quest currency?
The most efficient method is running Epic Boss quests on Expert difficulty with a full party of four during an event multiplier. A single run can yield nearly 4,000 currency during a 3x event, which is significantly better than any other activity. The Speed Clear event also offers a currency bonus for fast clears.
Can I solo epic boss fights?
Technically yes, but it's not recommended. Epic bosses are designed for team play, and the enrage timer makes solo clears extremely difficult. If you do attempt a solo run, focus on survival over DPS and expect the fight to take significantly longer than a coordinated team clear.
Do boss patterns change between difficulty levels?
The core patterns stay the same, but the attack speed and damage output scale with difficulty. On Expert difficulty, telegraph windows are shorter and recovery windows are tighter, which means you need to react faster. The pattern order remains consistent, so learning the patterns on Normal difficulty is still valuable preparation for higher tiers.