
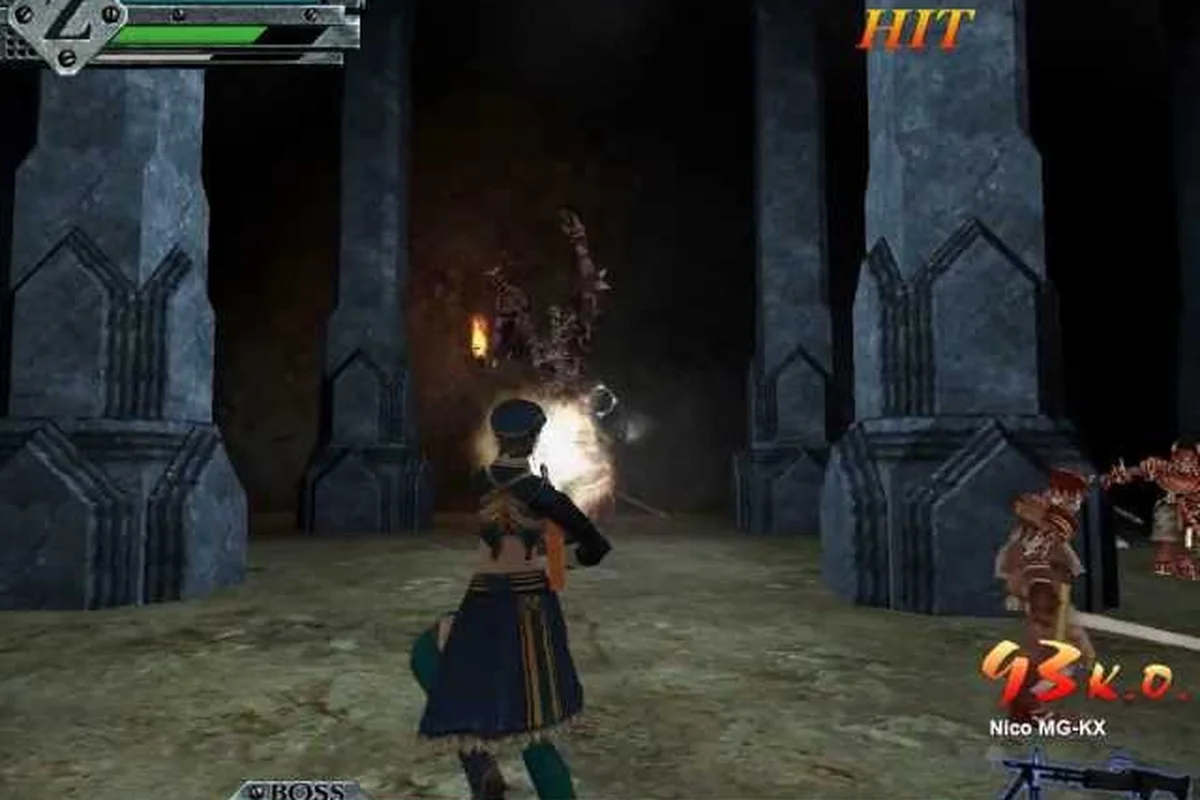
This GunZ The Duel PvE walkthrough maps your entire progression path, from the first co-op quests you'll queue into as a fresh mercenary to the endgame raid content that demands coordinated teams and polished movement. Because the remaster launched globally on Steam on August 13, 2026, the PvE scene is still settling, which means learning efficient routes now puts you ahead of the curve when the leaderboards and event rotations mature. Whether you're chasing exclusive loot drops or just want a break from the ranked duel queue, this guide covers the quest types, reward structures, and boss mechanics that define the PvE experience.
How PvE Quests Are Organized
The PvE content in GunZ: The Duel centers on co-op quests where teams of mercenaries fight waves of enemies and formidable epic bosses, according to the official GunZ: The Duel Steam page. Quest types break down into story quests, boss encounters, and event missions, each rewarding XP, BT currency, and exclusive loot that you cannot obtain through PvP matches alone. The structure mirrors the classic 2003 formula but with modernized matchmaking, so you can queue solo and get paired with randoms or form a premade squad for coordinated runs.
The progression loop is straightforward: complete quests to earn XP and currency, spend that currency on gear upgrades, then tackle harder quest difficulties that gate better rewards. What catches many new players off guard is that the PvE mode has its own gear economy separate from PvP, so you cannot simply bring your duel loadout into a raid and expect to perform well. Understanding this separation early prevents wasted investment and frustration when you hit your first wall.
Quest Types and Their Rewards
Each quest type serves a different purpose in your progression, and knowing which ones to prioritize saves you hours of grinding. For beginners, Story Mode quests (levels 1–20) are your primary leveling engine, awarding roughly 1,200–1,800 EXP per run on Normal difficulty while also dropping the low-tier Bounty Hunter armor pieces you'll need for early survivability. Once you hit level 21, shift your focus to Dungeon Runs like the Cursed Mansion, which not only yield 2,500+ EXP but also drop Crafting Materials (e.g., Iron Ore, Leather Scraps) essential for upgrading your weapon to +5 before tackling the first Raid, The Forgotten Citadel. The table below breaks down the core quest categories and what they offer, including the Raid exclusive Legendary Gem drops that only appear on Nightmare difficulty.
| Quest Type | Primary Reward | Best For | Difficulty |
|---|---|---|---|
| Story Quests | XP, BT currency, early gear | Leveling 1-30 | Easy |
| Boss Encounters | Exclusive boss loot, crafting mats | Mid-game gear upgrades | Medium |
| Event Missions | Event currency, limited cosmetics | Limited-time rewards | Varies |
| Endgame Raids | BiS gear, raid tokens, titles | Max-level progression | Hard |
Story quests are your introduction to PvE mechanics, teaching you enemy patterns and basic team coordination without punishing mistakes too harshly. Boss encounters require more attention because each boss has unique attack telegraphs and phase transitions that demand specific responses. Event missions rotate regularly and often introduce modifiers that shake up the standard formula, which keeps the mode fresh but also means you need to read the current event details before queueing.
Difficulty Tiers and Unlock Requirements
The difficulty system gates content behind both level and gear score requirements, which prevents players from jumping into endgame content unprepared. According to community reports from the first week of launch, most players hit the first difficulty wall around level 25 when the gap between story quest enemies and boss encounter enemies becomes noticeable.
| Difficulty | Level Requirement | Gear Score | Reward Multiplier |
|---|---|---|---|
| Normal | Level 5 | None | 1x |
| Hard | Level 25 | 200 | 1.5x |
| Expert | Level 40 | 450 | 2x |
| Raid | Level 50 | 700 | 3x |
The jump from Hard to Expert is where most casual groups start struggling because enemy HP pools increase significantly while the margin for error shrinks. This is also where the movement mechanics that define GunZ become essential, since kiting and positioning matter more than raw damage output. If you are new to the game's acrobatic combat system, consider reviewing the wall climb guide before attempting Expert content, because the ability to escape danger zones quickly separates successful runs from wipes.
Beginner Progression: Level 1 to 30
Your first hours in PvE should focus on completing story quests efficiently while learning the basic enemy types and their attack patterns. The early game is forgiving enough that you can experiment with different weapons and playstyles, but establishing good habits now pays dividends later. Focus on completing every story quest at least once because they provide guaranteed XP and currency that random quest grinding cannot match.
The most efficient leveling route, based on player experience shared in community forums, involves completing the main story chain until you unlock Hard difficulty, then farming the shortest boss encounter available. This approach balances XP gain against clear time, since story quests have long travel segments while boss encounters get you into combat immediately. You should also complete your daily quests every day because they offer bonus XP that compounds significantly over a week of consistent play.
Essential Gear for Early Progression
Your starting gear is sufficient for Normal difficulty, but you should upgrade as soon as you reach level 15 because the stat differences become noticeable. The early game gear progression follows a predictable path, and the table below shows what you should prioritize:
| Level Range | Weapon Priority | Armor Priority | Accessories |
|---|---|---|---|
| 1-10 | Default weapon | Starting set | None needed |
| 11-20 | First upgrade | Quest reward set | Starter ring |
| 21-30 | Crafted weapon | Dungeon drop set | HP accessory |
Weapon upgrades matter more than armor in PvE because killing enemies faster reduces the damage you take overall. The Rusty Sword you start with can carry you through level 15, but the Iron Cleaver available from story quest rewards around level 12 offers a significant damage boost. Armor becomes more important once you start facing boss encounters because the sustained damage from adds can overwhelm you if you cannot kill them quickly.
Building Your First PvE Loadout
Your loadout should prioritize survivability and sustained damage over burst potential, since PvE fights last longer than PvP duels. The Guardian Set from the level 20 story quest provides a good balance of defense and mobility that suits most playstyles. For weapons, the Repeating Crossbow excels at sustained damage while the Heavy Axe offers burst potential for boss phases with limited attack windows.
Mid-Game Mastery: Boss Encounters and Team Coordination
Once you hit level 30 and unlock Expert difficulty, the game shifts from teaching mechanics to testing your execution. Boss encounters at this tier require genuine team coordination because each boss has mechanics that cannot be soloed reliably. This is where the GunZ The Duel co-op guide principles become essential, as communication and role assignment determine success more than individual skill.
The mid-game bosses introduce mechanics like enrage timers, add spawn phases, and telegraphed AoE attacks that force teams to spread out and manage positioning carefully. According to community testing during the launch week, most Expert difficulty wipes happen because teams fail to assign clear roles for add control and boss damage. Establishing a simple strategy before pulling the boss prevents most of these failures.
Boss Mechanics Reference Table
Each boss in the mid-game rotation punishes a single, repeated mistake rather than raw DPS checks, so your team must adapt its positioning and cooldown usage per encounter. For example, the Clockwork Golem’s spin attack in Phase 2 requires all melee players to dash through its hitbox at the same moment, while ranged players must break its core within 10 seconds or it re-heals 15% HP. Meanwhile, the Frost Witch’s ice pillars demand a dedicated kiter to lure her AoE away from the raid’s healers. The table below summarizes these key bosses and the exact responses your team needs to execute:
| Boss Name | Key Mechanic | Counter Strategy | Recommended Team |
|---|---|---|---|
| Crimson Warden | Flame pillars that track players | Spread out, save dashes for pillar drops | 2 DPS, 1 Tank, 1 Support |
| Frost Revenant | Ice shields that reflect damage | Stop DPS during shield phase | 3 DPS, 1 Support |
| Storm Herald | Chain lightning that jumps between players | Maintain 10m spacing | 2 DPS, 2 Support |
| Void Tyrant | Adds that heal the boss | Dedicated add-clearer role | 3 DPS, 1 Tank |
The Crimson Warden is often the first wall for new teams because the flame pillars force constant movement while adds pressure your positioning. The Frost Revenant punishes greedy DPS because attacking during the shield phase reflects damage back at you, which can wipe an unprepared team quickly. Learning these patterns through repetition is the fastest path to consistent clears, so do not get discouraged by early failures.
Communication and Role Assignment
Clear communication separates successful Expert runs from chaotic wipes, and establishing roles before the pull prevents mid-fight confusion. The standard composition of 2 DPS, 1 Tank, 1 Support works for most bosses, though some encounters favor different splits. The tank's job is to maintain boss aggro while the support handles healing and buffs, leaving the DPS players free to focus on damage output and mechanic execution.
Voice chat makes coordination significantly easier, but the in-game ping system works well for groups that prefer text communication. Assign one player to call out boss mechanics when they happen, since the visual telegraphs can be subtle during intense fights. This callout role is often overlooked but consistently improves clear rates because it gives the team a single source of truth during chaotic moments.
Endgame PvE: Raids and High-Level Strategy
The endgame PvE content in GunZ: The Duel revolves around raids that require full team coordination and optimized builds. These encounters assume you have mastered the movement system and understand your class role completely, because the margin for error is minimal. The GunZ The Duel endgame PvE scene rewards preparation, and teams that research encounters before attempting them clear content significantly faster.
Raid content introduces mechanics not present in lower difficulties, including multi-phase boss fights, environmental hazards, and DPS checks that require optimized rotations. The Void Tyrant raid, the first endgame encounter available at launch, combines all three elements and serves as the entry point for serious PvE players. According to the official Steam news page, farming efficient quest routes is the fastest way to stockpile XP and currency for new accounts, which applies doubly to raid preparation.
Raid Preparation Checklist
Preparing for your first raid requires more than just meeting the gear score requirement—you need a loadout that can survive the opening gauntlet of the Maze of the Fallen, where the Dark Elf Archers can shred unshielded players in two hits. Beyond your primary weapon, you must stock a full stack of 50 Health Potions, at least 20 Mana Potions for sustained Dash-Cancel (DC) mobility, and a Revive Scroll as a safety net for your party's healer. The checklist below covers everything you should have in order before queueing, including the specific Armor Set bonuses (e.g., the Assassin Set for +15% critical rate) that make the difference between a smooth clear and a wipe at the Boss Gate.
-
Consumables: Stock healing potions and damage buffs, since raid fights last longer than any other content
-
Repair kits: Bring spares because raid bosses deal heavy durability damage to your gear
-
Food buffs: The best food provides 10% damage increase, which matters for tight DPS checks
-
Voice chat: Coordinate with your team before pulling, not during the fight
-
Boss research: Watch clear videos and read strategy guides before your first attempt
The gear score requirement of 700 for raid difficulty filters out underprepared players, but meeting the number does not guarantee success. Your actual performance depends on understanding the boss mechanics and executing your role consistently. Teams that skip the preparation phase often waste hours on wipes that could have been avoided with basic research.
Advanced Raid Strategies
The Void Tyrant raid has three distinct phases, each requiring different positioning and ability usage. Phase one focuses on add management while the boss telegraphs its void beam attack, which requires the tank to kite the boss away from the team. Phase two introduces void portals that spawn at random locations, and players must destroy them within 10 seconds or they summon additional adds. The final phase combines all previous mechanics while adding an enrage timer that forces the team to maximize DPS output.
The DPS check in phase three is the most common wipe point for new raid teams, since the boss enrages after 3 minutes and becomes nearly impossible to survive. This is where optimized rotations and food buffs make the difference between a clear and a wipe. Teams should practice their damage rotations on training dummies before attempting the raid, because every percentage point of DPS matters when the enrage timer is tight.
Optimizing Your PvE Builds and Loadouts
Build optimization becomes increasingly important as you progress through PvE content, since the stat requirements scale faster than your base character growth. The GunZ The Duel PvE for beginners approach focuses on balanced builds that can handle any situation, while endgame builds lean into specific roles and synergies. Understanding the stat system and how different stats interact helps you make informed gear decisions.
The primary stats in PvE are Attack Power, Defense, Health, and Stamina, with each serving a distinct purpose in your overall effectiveness. Attack Power directly increases your damage output, while Defense reduces incoming damage from all sources. Health provides a buffer against mistakes, and Stamina determines how many dashes and special moves you can perform before needing to recover.
Stat Priority by Role
A tank or support role should prioritize Vitality and Defense early to survive the brutal burst damage from the Golem King’s slam combo, while a DPS build needs to stack Attack Power and Critical Chance to burn down the Queen’s adds before the enrage timer hits. Knowing this stat hierarchy means you won’t waste Zenny on a high-damage accessory that leaves you one-shot in the GunZ The Duel PvE raid, so you can evaluate each gear drop against your role’s breakpoints instead of just the item score.
| Role | Primary Stat | Secondary Stat | Tertiary Stat |
|---|---|---|---|
| DPS | Attack Power | Stamina | Health |
| Tank | Defense | Health | Stamina |
| Support | Health | Stamina | Attack Power |
The DPS role prioritizes Attack Power above everything else because their job is to kill enemies and pass DPS checks. Tanks need Defense and Health to survive sustained boss damage while maintaining aggro, and Supports focus on survivability so they can keep the team alive through healing and buffs. This stat priority system means the same gear piece can be excellent for one role and useless for another, so evaluate drops based on your role's needs.
Weapon Selection for PvE Content
Weapon choice in GunZ The Duel PvE is less about a single "best" weapon and more about matching your loadout to the specific threat profile of each raid or co-op mission. For trash-heavy mobbing phases in the Mansion or Prison co-op maps, the SMG (like the MP5 or P90) offers the fastest reload and high sustained DPS, letting you clear adds without burning through your Dagger durability. However, when you hit a boss with a high-damage enrage timer—such as the Berserker in the Raid: Castle—you'll want to switch to a Shotgun (e.g., the Jackhammer) for burst damage windows, or a Sniper Rifle (like the PSG-1) to maintain safe distance while kiting. The table below breaks down these recommended weapon types per scenario, factoring in ammo economy, reload speed, and the need to keep your Katanas ready for Butterfly and Slash Shot mobility—since your melee weapon is often your primary survival tool, not your gun.
| Content Type | Best Weapon | Why It Works |
|---|---|---|
| Story Quests | Repeating Crossbow | Sustained damage, safe range |
| Boss Encounters | Heavy Axe | Burst damage for phase windows |
| Raids | Twin Swords | Balanced damage and mobility |
| Event Missions | Depends on modifiers | Check event details first |
The Repeating Crossbow excels in story quests because its sustained damage output clears waves efficiently while keeping you at a safe distance. The Heavy Axe shines in boss encounters where burst damage windows require you to maximize output in short periods. Twin Swords offer the best balance for raids because they provide consistent damage while leaving stamina available for the movement mechanics that raid bosses demand.
Frequently Asked Questions
What is the fastest way to level up in PvE?
The fastest leveling route combines daily quest completion with the shortest available boss encounter on the highest difficulty you can handle. Story quests provide good XP but have long travel segments, while boss encounters get you into combat immediately. Complete your dailies every day because the bonus XP compounds significantly over a week of consistent play.
How do I unlock raid difficulty?
Raid difficulty unlocks at level 50 with a gear score of 700. You need to complete the Expert difficulty version of the Void Tyrant encounter before the raid version becomes available. The gear score requirement filters out underprepared players, so focus on farming Expert difficulty until your gear meets the threshold.
What is the best team composition for raids?
The standard raid composition is 2 DPS, 1 Tank, 1 Support, though some encounters favor different splits. The tank maintains boss aggro while the support handles healing and buffs, leaving DPS players free to focus on damage output. Assign one player to call out boss mechanics during the fight for better coordination.
How important is movement skill in PvE?
Movement skill becomes essential at Expert difficulty and above because kiting and positioning matter more than raw damage output. The ability to escape danger zones quickly separates successful runs from wipes, especially during boss encounters with telegraphed AoE attacks. Practice the wall climb and dash mechanics before attempting high-difficulty content.
Can I solo endgame PvE content?
Soloing endgame raids isn't viable—Void Tyrant's void portals spawn randomly and must be destroyed within 10 seconds, a task impossible for one player. Use matchmaking or join a guild for 4-player raids; coordinating a tank for aggro and a healer for sustain is critical to avoid wipe loops.