
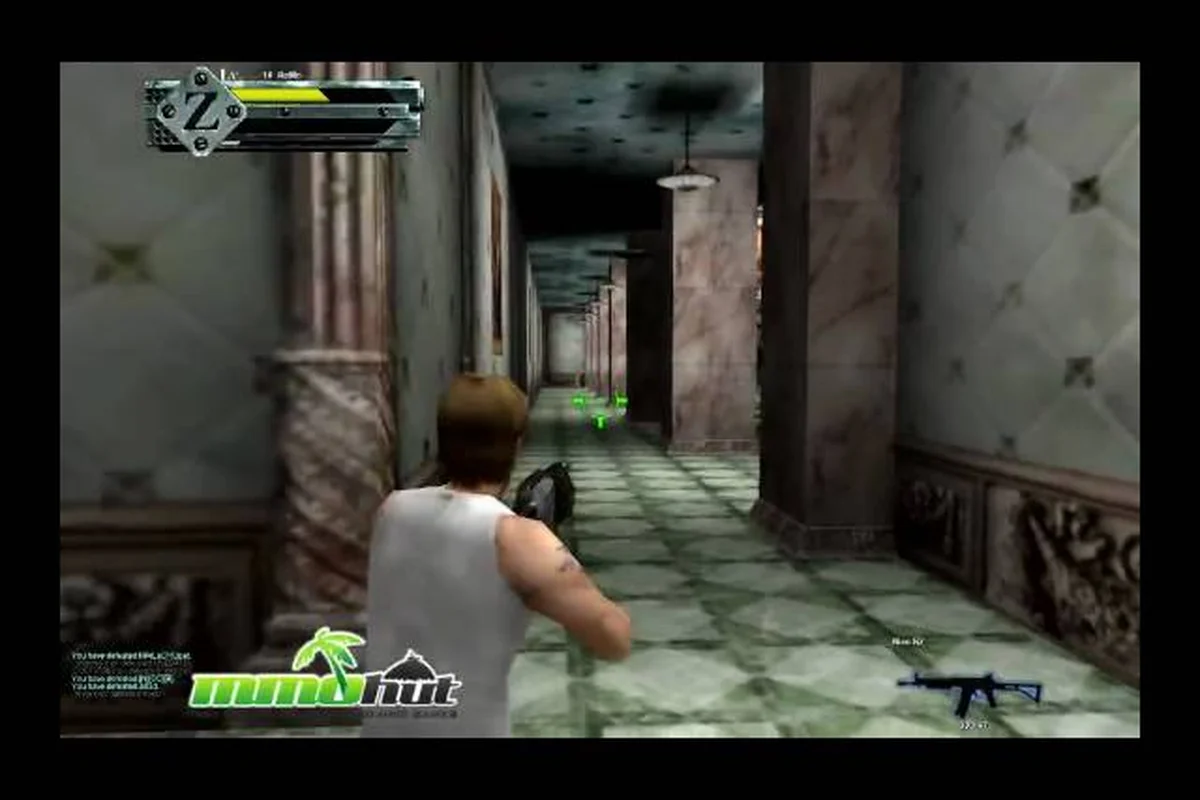
The GunZ The Duel training map is where every serious player builds the muscle memory that separates a casual duelist from a K-Style threat. Before you queue into ranked arenas or challenge a boss with a full co-op squad, the practice environment gives you a safe sandbox to drill dash-jump chains, wall-run timings, and weapon-swap combos without feeding kills to an opponent. According to the official GunZ: The Duel website, maps split into PvP arena maps (Duel, TDM, Gladiator, Battle Arena) and PvE quest maps for co-op missions and boss fights, with arena maps featuring walls, ramps, and elevated platforms that enable K-Style wall-runs and air combat. Understanding which training map suits your current skill level and which boss arenas demand specific positioning will save you hours of frustration and accelerate your progression curve significantly.
Why the GunZ The Duel Training Map Matters for Skill Growth
The training map is not just a static shooting range — it is a three-dimensional movement laboratory where the game's signature mechanics come together. Unlike the cramped corridors of some duel arenas, the practice environment is designed with generous spacing, multiple wall surfaces, and predictable geometry so you can isolate individual techniques before combining them under pressure. Community reports consistently highlight that players who spend their first few sessions exclusively on the training map develop smoother dash mechanics and more reliable wall-run execution than those who jump straight into public lobbies.
The official media page for the game confirms that training and practice maps give new players a safe space to learn wall-run, dash, and combo timings before competitive arenas. This is a deliberate design choice by the developers, and it reflects how the game's competitive ecosystem is structured. The skill floor for ranked play is higher than in most action shooters, so the training environment exists to bridge that gap.
Here is what you should focus on during your first training sessions:
-
Dash-jump chains — the foundational movement loop that lets you traverse the map faster than sprinting, which is the core of K-Style mobility.
-
Wall-run extensions — learning which surfaces allow a full wall-run arc and which ones cut your momentum short, since arena geometry varies widely.
-
Weapon-swap cancels — practicing the timing that lets you cancel recovery frames and chain melee into ranged attacks without a pause.
-
Air-control adjustments — using directional inputs mid-jump to correct your trajectory and land on elevated platforms with precision.
The training map's open layout means you can practice all four of these without interference, which is something the tighter PvP arenas simply do not offer. As you build confidence, you can transition into the broader GunZ The Duel maps list to see how these skills translate to real combat spaces with obstacles and sightlines.
Training Map Layout and Core Practice Zones
The GunZ The Duel training map is structured around several distinct zones, each designed to isolate a specific mechanic. Understanding the layout helps you build a practice routine that covers all the fundamentals without wasting time wandering between irrelevant areas.
The Flat Ground Zone
This is the largest open area in the training map, and it is where you will spend most of your early practice time. The flat ground zone has no elevation changes, which makes it ideal for drilling dash-jump input sequences and half-step timing without worrying about landing on uneven surfaces. Because the zone is completely flat, you can focus entirely on your input rhythm rather than compensating for map geometry.
The Wall-Run Corridor
A dedicated corridor with parallel walls runs along one side of the training map. This zone is specifically built for practicing wall-run chains and wall-to-wall transfers, where you jump from one surface to another without touching the ground. The corridor's walls are tall enough to support a full wall-run arc, and the spacing between them is calibrated to match the pacing of real arena maps.
The Elevated Platform Cluster
A series of platforms at varying heights sits at the far end of the training map. This zone simulates the vertical combat spaces found in battle arena maps, where players need to chain wall-runs into platform landings to gain a positional advantage. Practicing here teaches you to read platform edges and adjust your air control mid-jump, which is a skill that transfers directly to competitive play.
The Target Range
The target range features static and moving targets at different distances, letting you practice aim while incorporating movement. This is where you combine your dash mechanics with weapon accuracy, which is essential because GunZ: The Duel rewards players who can shoot accurately while maintaining constant motion.
| Training Zone | Primary Skill | Recommended Practice Time | Transfer to PvP |
|---|---|---|---|
| Flat Ground | Dash-jump chains, half-step | 30-40% of session | Duel arenas, TDM |
| Wall-Run Corridor | Wall-run arcs, transfers | 25-30% of session | Battle arena maps |
| Elevated Platforms | Air control, landing precision | 20-25% of session | Gladiator, competitive maps |
| Target Range | Aim while moving | 15-20% of session | All PvP modes |
The time allocation above reflects what experienced players recommend based on community testing. If you are brand new, shift more time toward the flat ground zone until your dash-jump input feels automatic, because every other technique builds on that foundation.
Best GunZ The Duel Practice Map Routines for 2026
Having a structured routine matters more than raw practice time. Players who wander aimlessly on the training map improve slower than those who follow a deliberate progression, because the game's mechanics build on each other in a specific order. Here is a routine that the community has refined over multiple patches, and it remains effective for the 2026 season.
The 15-Minute Warm-Up Routine
Start every session with a quick warm-up that activates your muscle memory without exhausting you. Spend the first five minutes on the flat ground zone doing continuous dash-jump chains, focusing on maintaining a consistent rhythm rather than maximum speed. The next five minutes go to the wall-run corridor, where you practice wall-to-wall transfers and try to complete a full corridor traversal without touching the ground. The final five minutes are spent on the elevated platform cluster, where you chain wall-runs into platform landings and practice your air control.
The 45-Minute Deep Practice Routine
Once you are warmed up, move into a longer session that targets specific weaknesses. The first 15 minutes should be dedicated to weapon-swap cancels, alternating between your primary melee weapon and your ranged weapon while maintaining constant dash movement. The next 15 minutes go to combat drills, where you use the target range to practice shooting while moving, then immediately closing distance with a dash-jump into a melee combo. The final 15 minutes are spent on scenario simulation, where you imagine an opponent's position and practice approach angles, retreats, and repositioning using the full map.
| Routine Component | Duration | Focus Area | Key Metric to Track |
|---|---|---|---|
| Dash-jump warm-up | 5 min | Flat ground | Consistent rhythm, no input drops |
| Wall-run transfers | 5 min | Corridor | Full corridor without touching ground |
| Platform landings | 5 min | Elevated cluster | Landing accuracy, air control |
| Weapon-swap cancels | 15 min | Full map | Cancel success rate |
| Combat drills | 15 min | Target range | Accuracy while moving |
| Scenario simulation | 15 min | Full map | Decision speed, positioning |
The key to this routine is tracking specific metrics rather than just going through the motions. If you can complete the wall-run corridor without touching the ground, you have mastered the transfer timing. If your weapon-swap cancels feel smooth, you are ready to bring that skill into actual duels. For players who want to test these skills in a structured environment, the GunZ The Duel practice mode offers custom match options that let you set up specific scenarios without the pressure of a ranked queue.
Boss Arenas in Training and Practice Maps
The GunZ The Duel boss map is a different beast entirely from the training map. While the training environment is designed for solo skill development, boss arenas are built for co-op coordination and pattern recognition. According to official materials, PvE quest maps are designed for co-op missions and boss fights, which means the layout is structured around team positioning and boss attack patterns rather than free movement.
Understanding the Boss Arena Structure
Most boss arenas in GunZ: The Duel follow a circular or semi-circular layout with a central boss platform and elevated ledges around the perimeter. This design gives teams multiple angles of attack while forcing them to stay aware of the boss's position at all times. The elevated ledges are not just for show — they provide safe zones during certain boss attacks, but they also limit your mobility if you get cornered.
The boss map's geometry is intentionally more restrictive than the training map. Walls are positioned to block certain escape routes, and the central platform is usually large enough for the boss to move freely but small enough that ranged players cannot simply kite indefinitely. This creates a positioning puzzle where teams need to balance damage output with safety.
Key Boss Map Positions
Every boss arena has a few critical positions that teams should learn early. The front-line anchor position is directly in front of the boss, where a melee player with good dash timing can maintain constant pressure while dodging attacks. The flank position is at an angle to the boss, letting a second melee player or a shotgun user deal damage from a safer angle. The ranged perch is an elevated ledge where ranged players can fire down at the boss while staying out of reach of most melee attacks.
| Boss Arena Position | Role | Risk Level | Primary Advantage |
|---|---|---|---|
| Front-line anchor | Melee pressure | High | Constant damage, boss aggro control |
| Flank position | Secondary damage | Medium | Safe angle, less predictable |
| Ranged perch | Sustained fire | Low | Safety, consistent DPS |
| Support rotation | Healing/utility | Medium | Flexibility, team survival |
The boss enrage mechanics vary by encounter, but most arenas include a soft enrage timer that forces teams to maintain a minimum DPS threshold. This is where the training map pays off — if your team's melee players have solid dash-jump execution, they can maintain damage while dodging, which keeps the fight on pace. Teams that struggle with boss fights often find that their players lack the movement fundamentals that the training map develops.
GunZ The Duel Map Rankings for Competitive Play
While the training map is essential for skill development, competitive play happens on the battle arena maps and duel arenas. Understanding the GunZ The Duel map rankings helps you know which maps favor your playstyle and which ones you should practice more before entering ranked queues.
The Current Competitive Map Tier List
The top competitive maps share a few common traits. They all have multiple wall-run surfaces that support K-Style movement, elevated platforms that create vertical combat options, and balanced spawn positions that prevent one team from gaining an immediate advantage. Maps that lack these features tend to rank lower because they limit the game's signature mechanics.
| Map Tier | Map Characteristics | Best Playstyle | Competitive Viability |
|---|---|---|---|
| S-Tier | Balanced geometry, wall-runs, vertical options | All-around, K-Style | Tournament staple |
| A-Tier | Strong sightlines, some movement limits | Ranged, positional | Strong situational pick |
| B-Tier | Restrictive geometry, limited wall-runs | Melee pressure | Map-specific counter |
| C-Tier | Gimmicky layouts, unbalanced spawns | Niche strategies | Rarely picked |
The map pick and ban system in competitive play means that understanding rankings is not just about knowing which maps are good — it is about knowing which maps to ban against specific opponents. If you are facing a player with exceptional wall-run execution, banning the maps with the most wall-run surfaces can neutralize their advantage. The GunZ The Duel map pick and ban guide breaks down this strategy in detail, including how to approach map selection in ranked play.
How Training Map Skills Transfer to Competitive Maps
The skills you develop on the training map transfer directly to competitive play, but the application changes based on map geometry. On S-tier maps with generous wall-run surfaces, your training corridor practice pays off because you can chain wall-runs across the map to reposition quickly. On tighter maps, your flat ground dash-jump practice becomes more important because there is less vertical space to work with.
The battle arena maps in particular reward players who have mastered the training map's elevated platform cluster. These arenas feature multiple levels and platforms, and players who can chain wall-runs into platform landings gain a significant positional advantage over opponents who stay on the ground floor. This is why the training map's platform zone is not just a practice aid — it is a direct preparation for the game's most competitive environments.
Building a Training Progression Plan
A structured progression plan ensures that your training map practice translates into measurable improvement in actual matches. Without a plan, it is easy to fall into the trap of practicing the same techniques over and over without addressing your weaknesses.
Phase One: Movement Fundamentals
The first phase focuses entirely on movement. Spend your first few sessions on the flat ground zone, drilling dash-jump chains until you can maintain them indefinitely without dropping inputs. Then move to the wall-run corridor and work on completing a full traversal without touching the ground. This phase typically takes 3-5 sessions, depending on your starting skill level.
Phase Two: Combat Integration
Once your movement is solid, start integrating combat. Use the target range to practice shooting while moving, then combine dash-jumps into melee approaches. The goal here is to make movement and combat feel like a single fluid action rather than two separate inputs. This phase takes another 3-5 sessions.
Phase Three: Scenario Simulation
The final phase involves simulating real combat scenarios on the training map. Imagine an opponent at a specific position and practice approach angles, retreats, and repositioning. This is where you develop the decision-making speed that separates competitive players from casual ones. This phase is ongoing — even veteran players use the training map to refine their approach to specific matchups.
| Progression Phase | Duration | Primary Focus | Success Metric |
|---|---|---|---|
| Movement fundamentals | 3-5 sessions | Dash-jumps, wall-runs | Full corridor traversal |
| Combat integration | 3-5 sessions | Aim while moving, combos | Fluid movement-combat flow |
| Scenario simulation | Ongoing | Decision-making, positioning | Faster reaction time |
The progression plan above is based on community testing and player reports from the 2026 season. Individual results vary based on your starting skill level and how much time you dedicate to each session, but the overall structure has proven effective for players transitioning from casual to competitive play.
Frequently Asked Questions
How long should I practice on the GunZ The Duel training map before playing ranked?
Most players benefit from at least 5-10 hours of training map practice before entering ranked play. This gives you enough time to build basic dash-jump consistency and learn the wall-run timings that competitive play demands. Focus on completing the wall-run corridor and maintaining dash-jump chains for extended periods before queuing up.
What is the difference between the training map and the practice mode?
The training map is a dedicated environment for solo skill development, while practice mode lets you set up custom matches with specific rules and scenarios. The training map is better for drilling individual techniques, while practice mode is better for simulating real combat situations against bots or with specific loadout restrictions.
Which boss map is best for beginners?
The early quest boss arenas are the most forgiving for beginners because they have simpler attack patterns and more generous safe zones. These arenas let you learn boss fight fundamentals like positioning and pattern recognition without the pressure of complex mechanics. As you improve, you can progress to the harder boss arenas with more demanding layouts.
Do I need to master the training map before trying competitive maps?
You do not need to master every technique, but you should be comfortable with dash-jump chains and basic wall-runs before entering competitive play. These are the foundation of K-Style movement, and players who skip this foundation often struggle to keep up with opponents who have solid movement fundamentals. The training map is the fastest way to build this foundation.
How often do the competitive map rankings change?
Competitive map rankings shift only when balance patches alter movement mechanics or map geometry—the 2026 season adjusted rotations slightly, but S-tier arenas like Duel and TDM remain stable. Always check patch notes after updates, since wall-run and dash timing changes can demote a map overnight.